I’ve been copying 7TB of data in about 100.000 files from an old fileserver to the new one, but I just noticed that some of the files are corrupted! Gahhh…
Chkdsk found some issues, but didn’t solve the problem. As this server is running Windows Server 2012 R2 with Data Deduplication I decided to have a look at that. 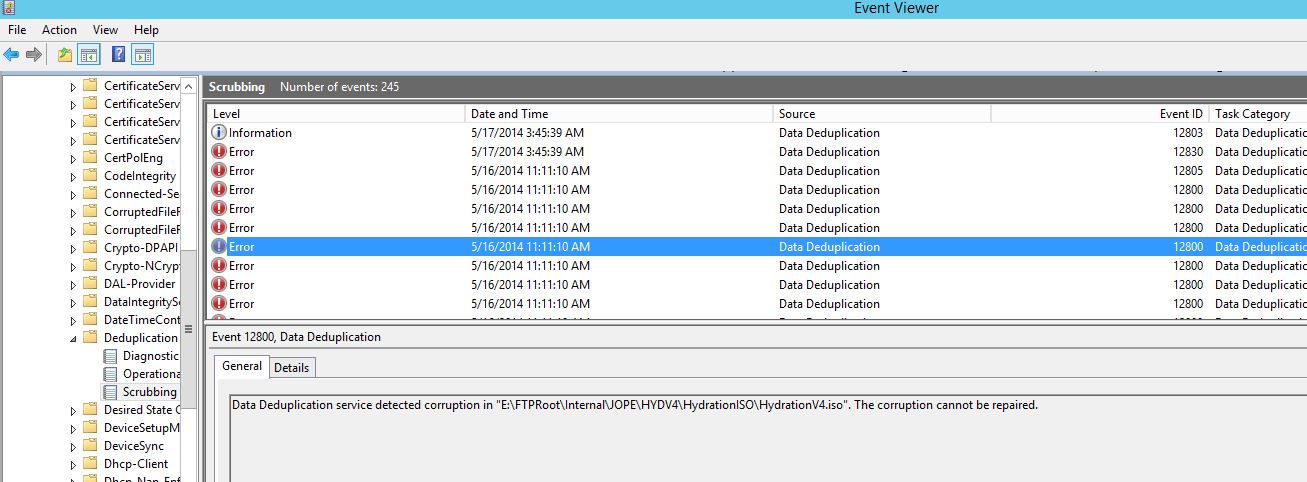
Yeah, unfortunately a lot of corrupted files with EventID 12800
|
1 2 3 4 5 6 7 8 9 10 |
Log Name: Microsoft-Windows-Deduplication/Scrubbing Source: Microsoft-Windows-Deduplication Date: 5/16/2014 11:11:10 AM Event ID: 12800 Task Category: Data Deduplication Scrubbing Task Level: Error Keywords: Reporting User: SYSTEM Description: Data Deduplication service detected corruption in "Drive:\PATH\FILE.Name". The corruption cannot be repaired. |
So Data Deduplication is reporting a lot of corrupted files, and this error message didn’t really make me any happier.
|
1 2 3 4 5 6 7 8 9 10 11 12 13 14 15 16 17 18 19 20 21 22 |
Log Name: Microsoft-Windows-Deduplication/Operational Source: Microsoft-Windows-Deduplication Date: 5/21/2014 8:00:16 PM Event ID: 4105 Task Category: None Level: Error Keywords: User: SYSTEM Description: Data Deduplication error: Unexpected error. Operation: Add a merged target chunk store container. Reconciling duplicate chunks in the chunk store. Running the deduplication job. Context: File name: \\?\Volume{d44b1e9d-922f-46b7-965b-05d184cc6b74}\System Volume Information\Dedup\ChunkStore\{D2110CC9-B0D2-4F6A-B391-0680AE13C77B}.ddp\Stream\002b0000.00000002.ccc File name: \\?\Volume{d44b1e9d-922f-46b7-965b-05d184cc6b74}\System Volume Information\Dedup\ChunkStore\{D2110CC9-B0D2-4F6A-B391-0680AE13C77B}.ddp\Stream\002b0000.00000001.ccc Chunk store: \\?\Volume{d44b1e9d-922f-46b7-965b-05d184cc6b74}\System Volume Information\Dedup\ChunkStore\{D2110CC9-B0D2-4F6A-B391-0680AE13C77B}.ddp\Stream Volume name: E: (\\?\Volume{d44b1e9d-922f-46b7-965b-05d184cc6b74}\) |
Hopefully this quick and dirty powershell script that I just wrote can help you too.
As I still had the working fileserver with working files available, I decided to just delete all corrupted files with this script.
|
1 2 3 4 5 6 7 8 9 |
$corrupted = Get-WinEvent -LogName Microsoft-Windows-Deduplication/Scrubbing | where ID -EQ "12800" $msg = $corrupted | select Message $file = $msg -replace ". The corruption cannot be repaired.}","" $files = $file -replace "@{Message=Data Deduplication service detected corruption in ","" foreach ($file in $files) { Get-Item ($file.Remove(0,1) -replace ".$") | Remove-Item } |
And then ran a robocopy script to recopy everything (it will skip any files that already exists making it a quite fast process).
robocopy /mir /copyall /r:1 /w:1 \\source\path \\destination\path
Updated 2014-05-22 16:22: Added a full delete and copy script, which is a bit better written;
|
1 2 3 4 5 6 7 8 9 10 11 12 |
$corrupted = Get-WinEvent -LogName Microsoft-Windows-Deduplication/Scrubbing | where ID -EQ "12800" | Sort-Object -Property Message $sourcedir="\\server\share$\" foreach ($entry in $corrupted) { # Write-Output $entry $file = "$((($entry | select -ExpandProperty Properties)[4]).value)$((($entry | select -ExpandProperty Properties)[5]).value)$((($entry | select -ExpandProperty Properties)[6]).value)" write-output "Deleting file: $file" Get-Item $file -ErrorAction SilentlyContinue | Remove-Item -Force write-output "Copying file: $file" Copy-Item "$($sourcedir)$((($entry | select -ExpandProperty Properties)[5]).value)$((($entry | select -ExpandProperty Properties)[6]).value)" -Destination $file -Force } |